What to do when a reverse osmosis system continually runs to drain
There are many under-sink reverse osmosis units on the market, however they all share common characteristics. Here is a quick run down on the basic operation which will help you identify what the issue may be if your system is constantly running to drain. For those of you who have some knowledge of plumbing or reverse osmosis systems, here is our quick guide, followed by a more comprehensive run down of all the parts and issues that you may face if trying to fix your own system for the first time.
REVERSE OSMOSIS NOT SHUTTING DOWN – QUICK GUIDE
- When the holding tank is filling with water it is normal to hear water running into the drain, when your unit was first installed you may not have noticed this noise. A common reason for this is that some dirt may have lodged in the drain tube coming from your RO unit, you can fix this by removing the tube from the drain clamp and cleaning it.
- If the tank is heavy (lift it up) and the water has been running constantly for a number of hours without drawing any water at your water filter tap you can proceed to troubleshooting your system.
- Turn the tank tap off, if the water stops running to drain after a few minutes then there is no problem with the unit. If the water continues to run then you have a faulty shut off valve or a faulty non return valve, in some circumstances you may have a water pressure issue – either too high or too low.
TESTING THE SHUT OFF VALVE AND THE NON RETURN VALVE
- Turn off the water feed to your RO unit
- Remove the drain tube from the drain clamp and place into a bucket
- Open the tank tap, if the water starts running through the drain tube, the issue is a faulty non return valve which is allowing water to go back from the tank into the membrane housing and in turn to drain. If there is no water running to drain after you do this then there is a faulty shut off valve
If this makes no sense at all please do not despair, we are going to explain things in more detail below – this guide as mentioned is for plumbers or people with more experience with water filters. By reading below and watching our videos, we would hope that even a novice would be able to repair their system with a little bit of time and patience without having to pay expensive plumbing fees. The following guide and video may just help to give a better idea of how the system operates
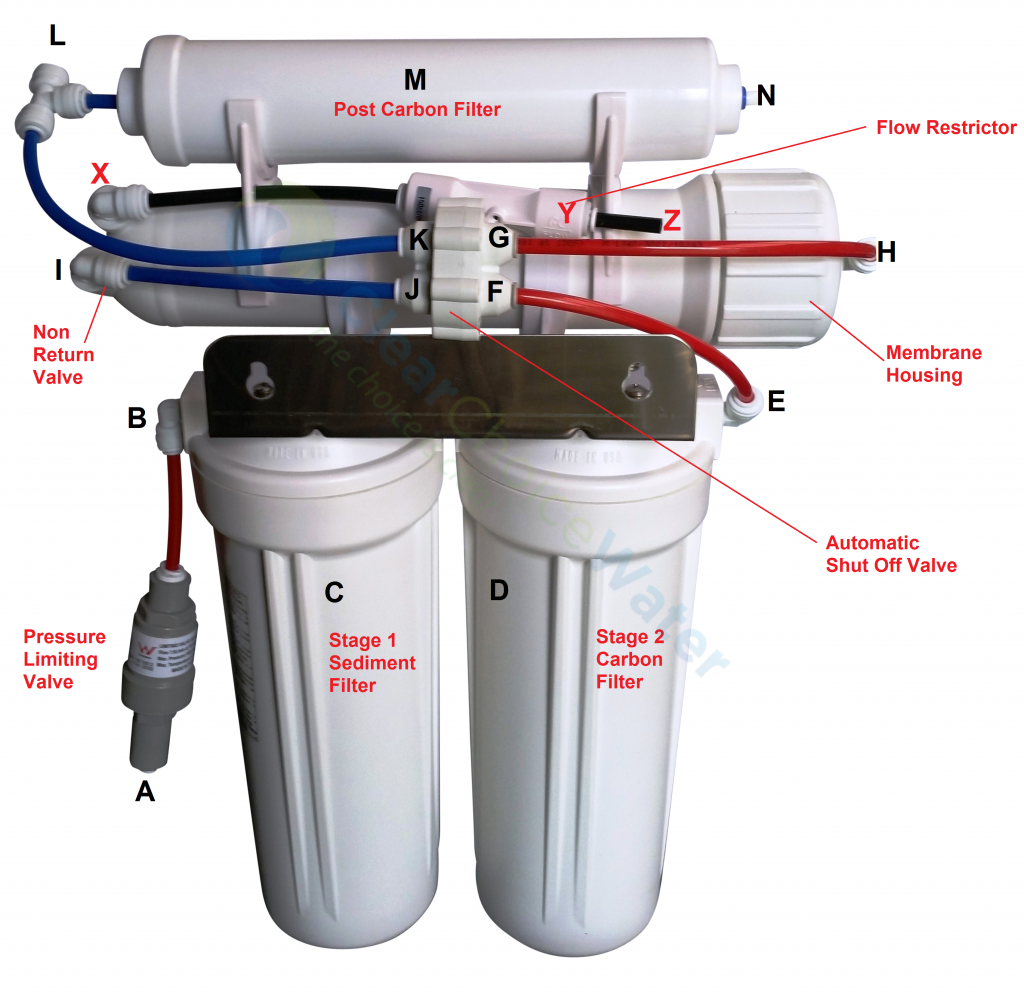
Tap water flows through the system from point A through a pressure limiting valve, into stage 1 then into stage 2 and into the ASO (automatic shut off valve) at point F. It then travels into the feed side of the membrane housing point H. From there it leaves the housing at points I and X.
X is the drain or permeate outlet which has a flow restrictor to help balance the pressure going through the membrane itself.
The pure water exits at point I and goes back into the ASO before leaving at point K and then goes to the holding tank at point L. The tank only has one water feed which flows in both directions, depending on whether your pure water tap (lets call it a faucet for simplicity) is turned on at the sink. When the faucet is off the water will continually flow to the tank until it reaches 2/3 of the incoming main pressure supplied from point A, at this point the ASO valve will close stopping the entire process.
If the faucet is opened when the tank is filling or the tank is full, the water will flow towards point L and through the post filter, as soon as the faucet is turned off the pure water will flow away from point L again until the tank is full.
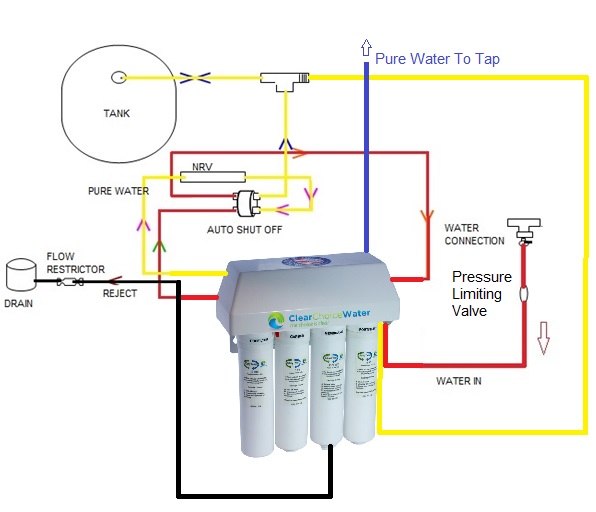
FIG 2
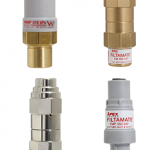
Your system may not look like ours however it will most likely have the same set up when it comes to the main components. The first thing that you have is water going into the filter, our systems use red tubing however on your system you will need to trace the tube coming from the cold water line feeding the inlet side of your purifier. The pressure limiting valve will look something like this:
HIGH WATER PRESSURE (UNCOMMON)
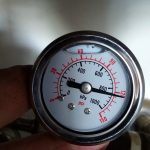
If you cannot identify that there has been a pressure limiting valve installed this could be a cause of the issue. The reverse osmosis system relies on the shut off valve identifying when the tank has reached around 2/3 of the pressure of the incoming water, if the water pressure feeding your system is excessively high then the pressures will not equalise and the system will not shut off. This is uncommon however here is a video of a an undersink reverse osmosis unit that we fixed in Sydney. When we disconnected the tank and used a ball valve to shut down the system all worked perfectly, as soon as we re-connected the tank the problem started up again, we replaced the tank before putting a pressure gauge on the drain and found that the incoming water was over 800 KPA (120 PSI). The recommended pressure is 415 KPA (60 PSI) no lower than 275 KPA (40 PSI) . In some better built RO systems, a pressure gauge is built into the unit, if your unit does not have this you may just have to listen for a noise such as the one in the video below.
LOW WATER PRESSURE
This is a more common issue, if the water pressure feeding your reverse osmosis system is less than 275 KPA (40 PSI) the water will not push through the membrane and the system will not shut off. If your system does not have a built in pressure gauge such as our 5 Stage and quick change reverse osmosis systems then you will have to test the pressure using a measured jug. In most cases the cold kitchen tap can be used, ensure that all the appliances such as dishwashers etc. are not switched on and that all other taps are turned off.
Here is how to measure your water pressure
- Get a water jug (preferably 1 or 2 litres in size)
- Get a stopwatch (usually found on most mobile phones)
- Place your jug under a tap and turn it on
- Time 6 seconds on your stopwatch & turn your tap off.
- If you’re a whizz at maths, you can do the next bit in your head (or simply use a calculator – found on most mobile phones). Take the amount of water in the jug in litres (e.g. 0.8 litres) and multiply this by 10. This will give you your flow rate in litres per minute (e.g. 0.8 litres x 10 = 8 litres per minute).
- If your flow rate is less than 10 litres per minute, you have what is considered low water pressure. Anywhere between 10 and 15 litres per minute is acceptable but can be improved. A flow above 15 litres per minute is considered good.
OTHER CAUSES OF LOW WATER PRESSURE
When is the last time you serviced your reveres osmosis system? The cartridges that go before the membrane are designed to protect the membrane from blocking with sediment or being damaged from chlorine attack. Most RO units will have a sediment filter followed by a carbon filter which should be changed every 6 – 12 months depending on water quality in your area. If any of the pre filters are blocked then this will reduce the pressure of water pushing into your membrane and prevent the unit from shutting down.
An older membrane may not be working effectively so as pressure builds in the tank as it fills, it becomes so slow the Shut Off Valve never senses enough tank pressure to close. (2/3 of what the feed pressure is)
To do a flow rate test:
Turn the tank valve off, open your water filter tap at the sink and let it run for a few minutes. Then collect the slow trickle in a measuring cup. A 35 GPD membrane should produce 2-3 ounces and a 50 gpd should produce 3-4 ounces in 60 seconds. This can vary due to feed pressure and water temperature. It will give an indication of what the membrane is doing. While testing make sure any remote connections are closed like a run to the fridge / ice maker.
THE NON RETURN VALVE
As you can see in Figure 1 the non return valve I is on the pure water outlet of the reverse osmosis membrane housing. If this was not there the pressure of water from the holding tank would simply push back into the membrane causing the drain water to run continually. The non return valve can be either built into the elbow as in this example in Fig 1 or it can be inline as in the image below:
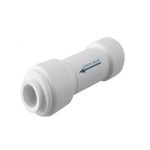
This is what a 5 Stage RO sounds like when it has a faulty non return valve
Note the pressure gauge – system tries to shut down however is unable to due to back pressure
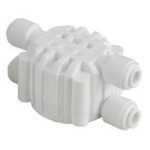
THE AUTO SHUT OFF VALVE
This is a 4 port valve which automatically closes once the pressure in the holding tank reaches 2/3 of that of the feed pressure. There are different types of shut off valves such as those in the image below however the same principle applies, water goes in and out on both sides of the membrane housing and allows the system to reach a balance point.
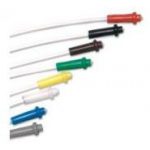
THE FLOW RESTRICTOR
As you can see in Fig 1 the flow restrictor Y is on the drain connection, in this image, the flow restrictor is what we call an inline. This restrictor can be removed and replaced very easily and also can be removed if you wish to “flush” the membrane. The ro membrane may become soiled over a period of years, removing the restrictor will allow you to push water into the housing at full flow which will help clean the membrane. In normal operation the restrictor will slow the water flow to the drain and is matched to suit the production rate of the membrane. If the water is flowing too quickly to drain then the water pressure will not be sufficient to push through the membrane and therefore the tank will not fill and the system will constantly drain water. The other type of flow restrictor that you may have is one that fits into the elbow marked X in Fig 1. Yours may look like something in the image below:
THE HOLDING TANK
The tank that holds the pure water will look something like this:
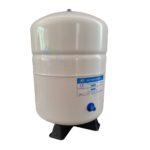
There is a butyl bladder inside the tank that is full of air, the air pressure when the tank is empty should be around 7 PSI. This can be measured using a digital tyre pressure gauge by removing the cover on the side of the tank which exposes the schrader valve. If the air pressure is too low this may stop your system from shutting down, if the tank bladder is not damaged it is easy to put some more air into the tank. If you see water coming from the schrader valve, it means that the bladder has ruptured.
How to Re-Pressurise your tank
1. Shut off the water supply to the RO system, keep the tank tap open
2. Turn on the faucet to allow water to run until it stops or noticeably slows down.
3. Check to see if there is still water in the storage tank by lifting the tank. If the tank feels heavy, that means you need to recharge the tank and continue the following steps.
4. Locate the air valve on the side of the tank, it has a blue plastic cover see diagram, unscrew the blue knob, the valve looks like the air valve on tires.
5. Use a bicycle pump (good quality) to pump air into the tank. Keep the faucet on while pumping air, so that all water inside the tank can be purged out. You should see an increase of flow as you pump the air into the tank.
6. After all water has been drained from the tank (tank will be light to lift), use an air pressure gauge to check the tank pressure. We recommend a digital gauge which can be bought at an auto store.
7. The tank should have 7 psi of pressure when it’s empty. Add or purge air if necessary.
8. Turn the feed water valve back on, and turn off the faucet to allow refilling of the tank.
9. Finished.
The problem reoccurred a couple of days later? This means that the bladder inside the tank is ruptured and cannot hold the air. All you can do is replace the whole tank.
That wasn’t it? Also consider:
- Clogged filters or bad RO membrane – Clogging usually occurs when a membrane has to process exceptionally hard water. You have two options: You can either replace membranes more frequently which will add to the costs. Or you can install an additional pre-treatment system – think water softener – which will remove all hardness minerals from the water before it enters the filter system. If one or more clogged filters are causing the problem, again, replacement is necessary.
- RO Membrane not properly seated
- Bent tubing
- Feed water valve or tank valve closed